Half Dome was on my bucket list and I knew it’d be a challenge, but it definitely pushed my boundaries physically. On this October day at the end of the permit season, my friend Sandra and I traversed across Yosemite toward Half Dome. We originally had our minds set on hiking Clouds Rest, but since shuttles stopped running for the season, we decided to trek up to Half Dome. If you’re afraid of heights, climbing the cables of Half Dome will likely be frightening. I know they say it’s a 45 degree angle, but when you’re up there, it really feels more like an 80 degree angle. Some of the most fearless and physically fit people I know confirmed that they found the cables to be daunting, so I’m not alone in this thought. Here’s what you should know and take into account before hiking Yosemite.
Before
Since this was more of an impromptu decision, Sandra and I completed our hike without flashlights and we approached Half Dome without gloves, which obviously most people come prepared with. Note: we really recommend packing headlamps even if you *think* you’ll return before sundown.
To prepare for Half Dome, you’ll want to be adequately packed, but definitely not over-packed since you’re carrying this weight nearly 15 miles round trip. Altogether, my pack weighed about 10 lbs at the beginning of the hike. I probably packed more than I needed to because I’m a very “in case of emergency” type of person, but the water accounted for a good share of that weight as well, and we both drank through our water supply.
How to Prepare for the Half Dome Day Hike:
What to bring (or what we brought)
- 2 L of water
- Water cleaning tablets
- Headlamps (or flashlights)
- Gloves (optional, there is a pile at the base of Half Dome)
- Wear shoes with traction*
- Toilet paper
- Protein snacks, like bars and beef jerky
- Electrolyte additives – you’re sweating a lot, so make sure you keep your levels balanced
- Trail mix
- Dried fruit
- Pretzels
- Gauze or band-aids
- Moleskin for our feet
- Spare wool hiking socks
- Chapstick with SPF
- Small sunscreen
- Permit: you legally need a permit to hike the cables at Half Dome. The lottery takes place in March, from the 1st-31st and 225 slots are allotted per day during preseason. If you don’t win the lottery at this time, you can apply two days before you want to go and 50 permits are awarded per day. Weekends are significantly harder to win (probably about 20-30% success). Pro tip: have every member of your group apply for permits for a greater chance of winning.
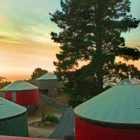
Lodging
We stayed overnight at Half Dome Village (formerly Curry Village) which a lot of people do if embarking on the full hike the next day. Reservati ons can be made online, and the tent cabins are legitimate, but we recommend getting a heated unit if possible. Most hikers leave around 4-5 AM so they can get to Half Dome early and beat the crowds on the cables. We didn’t leave until about 10 AM and didn’t return until late that evening.
An alternative is to hike 4 miles up to Little Yosemite Valley Campground, spend the night, and then start your journey the next day already four miles closer to Half Dome. However, this village is first come first serve, so you need to get there early enough the day before going to Half Dome to get a wilderness permit and reserve a spot. You also will need to carry all your camping equipment, which I couldn’t even fathom because those 4 miles are quite treacherous.
Parts of the Hike
Mist Trail
We were dropped at the Happy Isles Trailhead and started on the Mist Trail. Not long after, you’ll reach the Vernal Falls Bridge, which this is the last point to get water from a fountain. Beyond the fountain is when the hill really starts to incline, and this was the first test of my physical limits. I *may* have had the thought cross “well, it’s been great HD, but I’m ready to turn around now!”…however, I persevered. The stairs are chunky, uneven, and large especially for someone with short legs like myself. When you reach the top, you’ll have a rewarding view of the top of the beautiful Vernal Falls.

Nevada Falls
After these first falls, you’ll continue up and onward. This part of the hike has a lot of switchbacks, and you gain quite a bit of elevation. In my opinion, this first part of the hike and the latter (subdome/half dome) were the most challenging. When we finally got to the top of this part, which is where John Muir Trail and the Mist Trail meet, we’d only gone 3-4 miles, but it felt like so much more. Here we took a snack break, and there’s a pit toilet restroom.
Merced River
At this point, you’ll continue on the John Muir trail and the hike flattens the most. Enjoy it, because you’re about to start inclining even more. This is also where Little Yosemite Valley Campground is, as mentioned earlier. This part of the hike resembles a meadow with open space, surrounded by trees, with alternating patches of sunlight and shade. Some parts are even a bit sandy, and I really enjoyed this part of the trail since it was mellow and provided beautiful 360 views ofYosemite. The trail splits after a couple miles, and you’ll see where to continue to Half Dome as you enter a forest.

Sundown on John Muir Trail was stunning, this picture doesn’t even being to capture the beauty of Yosemite at that hour.
The Neverending Forest
Okay, brace yourself because I swear this part never ends. Every time I thought we were remotely close, this trail dragged on. And on, and on. It’s a total tease as it is a curvy path, and since you’re constantly winding your way up, you think you’re making more distance than you actually are. The nice thing about this part though is that you’re surrounded and covered by trees, so you’re not baking in the sun.
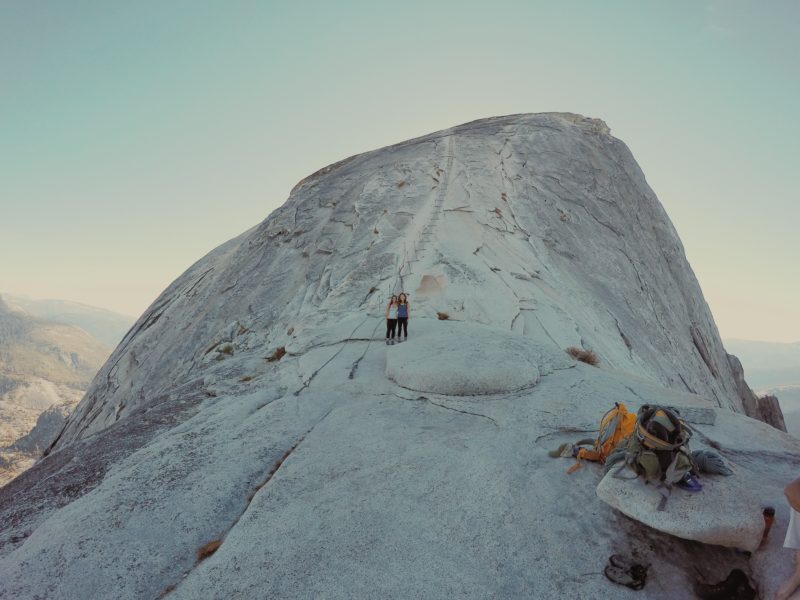
Sub Dome
Finally finally finally after that gentler incline, you’ve reached the base of Half Dome. The glory! This part felt so exciting, until you realize what’s next. If there’s anything that will deter you from climbing Half Dome, this part will really suck up any of that last energy you have and put your willpower, strength, and endurance to a test. Sit under your last chance of shade here  and drink up some water before you begin Sub Dome.
Here you’ll encounter a narrow set of curving stairs that are sized for Big Foot with foot traffic going both ways. Take rest breaks when needed, but prepare since eventually, these stairs end and you’ll have to walk up slanted granite to Half Dome. This is where my recommendation of having sturdy shoes with good traction really help. If you have the right shoes, walking up this granite won’t be
hard.
Half Dome, the Ascent
When you fiiinallly reach the base of Half Dome where the cables begin, you’ll think “Hallelujah!” Then, you’ll look up at the cables and they’re much more intimidating in-person. You can leave your pack at the bottom, and it’s probably unlikely anyone will steal your belongings (I make no promises). Take a deep breather, put on your gloves, and you’ll start the climb. Some people do go up halfway and turn around, and I understand why. Bottom line: don’t look back or down if you’re afraid of heights or feeling a little frightened.
The granite is slippery. Be prepared for the fact you won’t necessarily have 100% grip with every step, and the wooden planks that are nailed in every 2-3 yards often are shaky or splitting. These were a saving grace though when we needed to take a break. I held on to the cables for dear life, and I’d suggest not having such a volcan death grip as I did since it really wore my hands out and I needed that strength for the way down. You will be pulling yourself up with upper body strength on the highest slant of the dome. The challenge too is that people are coming down while you’re going up, so communicate with your peers on who goes when. Fortunately, on the way down, few people were coming up so Sandra and I didn’t have to worry about getting in other people’s way as much. We also went backwards, which was the most suitable for both of us since we were terrified to face that view down. Take your time, and don’t feel pressured by others. If anything, move aside and let them pass safely.

Staring at this in-person was nearly menacing, but it was a real treat to reach the top. PS those little ants on the slope are people.
John Muir Trail
Due to our later start, we took our time coming down the cables but the sun was getting ready to set at this point. We scurried our way back through the never-ending forest, which is still never-ending on the way back, and past Merced River. By the time we reached Nevada Falls where you can continue along the John Muir Trail or Mist Trail, it was pitch dark. We only had a tiny keychain flashlight to guide us through the darkness and ward off any animals (not recommended! absolutely pack more light for your hike). Despite the John Muir trail being 1.5-2 miles longer than the Mist Trail, we chose to take it back since it was less rigorous, and the thought of doing switchbacks and climbing down huge stones in darkness didn’t sound like a good idea. Fortunately, we caught up with a large group toward the end of our hike and felt safer with so many people and lights.
The next day, we ate pastrami sandwiches and beer. Hiking Half Dome was arduous and at times, painstaking, but 100% rewarding.

The REFUGE has one of the best pastrami sandwiches my taste buds have ever experienced. San Carlos, CA